


For a business to operate efficiently and grow quickly it is important to take advantage of automation of processes and activities. This reduces the time required to perform repetitive tasks and gives more space for your team to engage in more creative activities.
Thanks to the possibilities offered by technology, the use of automation is at your fingertips even when you are selling on Shopware 6. With the Rule Builder tool, you can streamline many business or marketing operations without having to hire programmers to do it.
Rule Builder can be compared to a command center where you give direction to your customer’s journey and personalize it. With just a few clicks, you can set up even very complex scenarios related to content management, shipping procedures or payments.
Previously, it required several different tools to do this, and each would typically cost extra and require many hours of integration. This complicated not only implementing the tools or monitoring whether they were working correctly, but also made analyzing the results difficult and hinder possible optimizations. It often aroused anxiety at the very thought of automation, as one had to learn how to use several systems and then waste time clicking through them. After all, this is not the purpose of automating activities, their purpose is to support our work.
You’re probably familiar with the so-called abandoned cart emails that we receive from online stores if we do not finish a transaction. This is just one example of marketing automation to support sales. However, alongside this type of activity, you may also want to automate processes such as:
- automatic calculation of shipping costs for orders on the basis of various conditions (e.g. country, postal code, package weight, customer status),
- defining conditions that must be met for a customer to have certain forms of payment available,
- generating separate price catalogs for different customer groups, days of the week or hours,
- changing the store view depending on regions or a selected language.
The key feature of functionality for e-commerce automation should be simplicity and intuitiveness. Let’s see how Rule Builder works in practice.
Basic settings
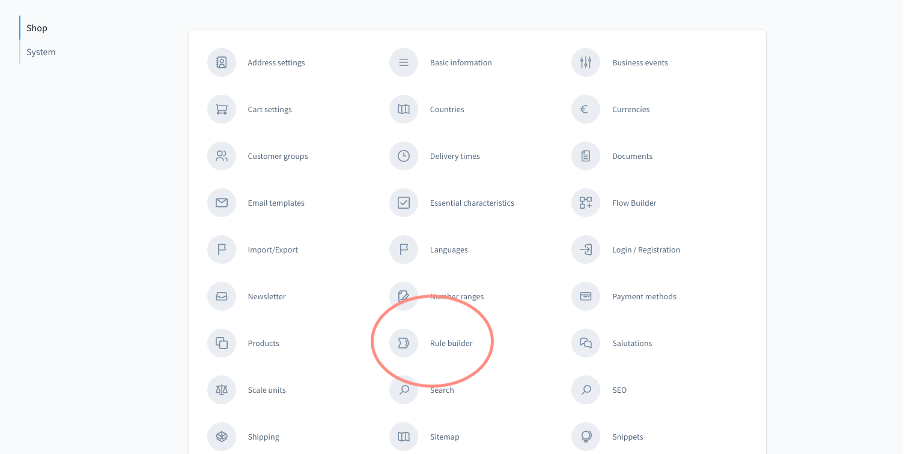
Rule Builder can be found in the settings in the admin panel. To use it, select it from a drop-down list.
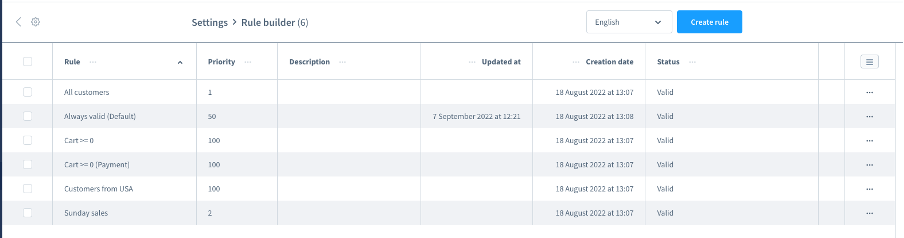
When you select Rule Builder, you will see a list of all previously created rules, accompanied by the following information:
- Rule – which is a name of the rule (defined by you every time you create a new rule),
- Priority – it determines the priority of the rule’s action after meeting the conditions set by the client. The rule with a higher priority is applied first, for example, a rule with a priority of 8 will be executed before the one with a priority you set to 2,
- Description – this is optional when creating a new rule, but it is worth adding some description that will help you later identify the actions performed by the rule (the description is visible only to you),
- Updated at – will display the date of the last update of the rule,
- Creation date – will display the date when the rule was created.
By clicking on the drop-down menu in the upper right corner of the table, you can select what you wish to show additionally in the table view.
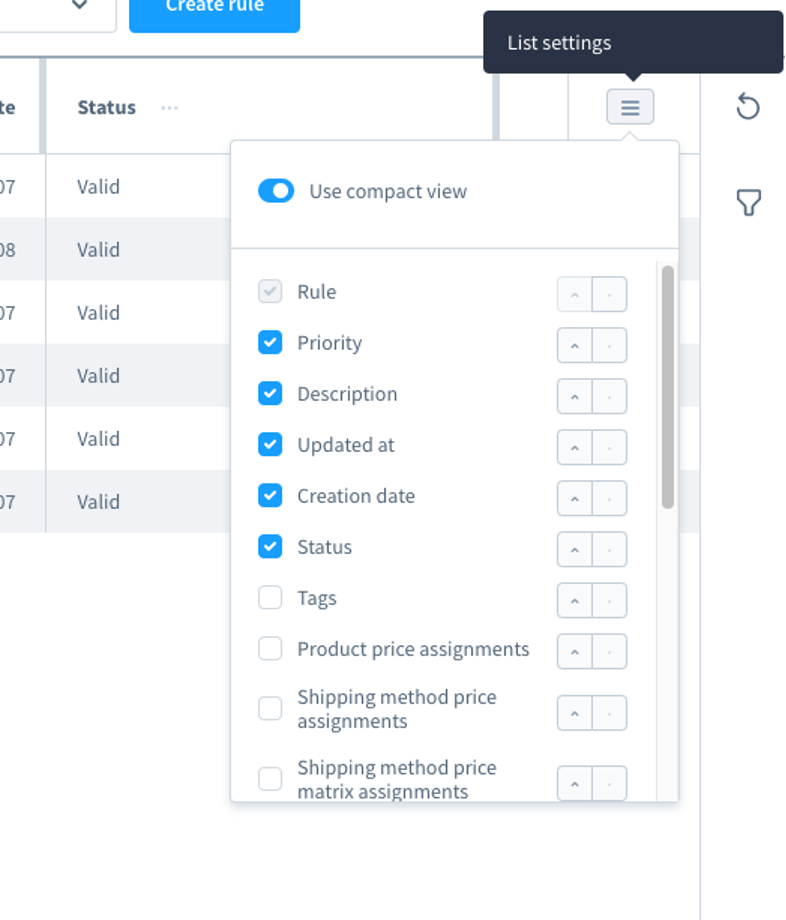
The view can be customized according to your preferences.
Create rule
To create a new rule, click on “Create rule” to open the wizard.

IMPORTANT! For a rule to exist, it must have at least one condition defined. However, there is no limit to the number of criteria it should meet.
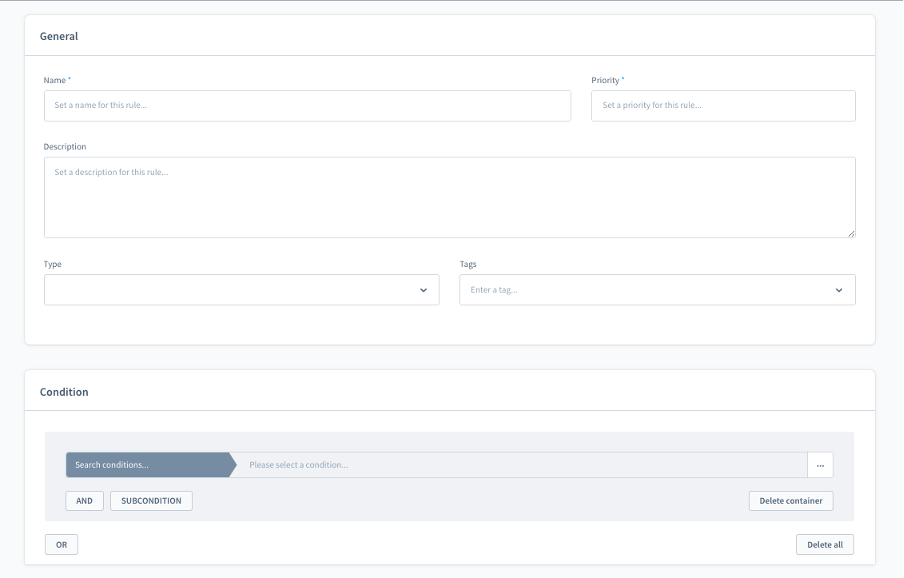
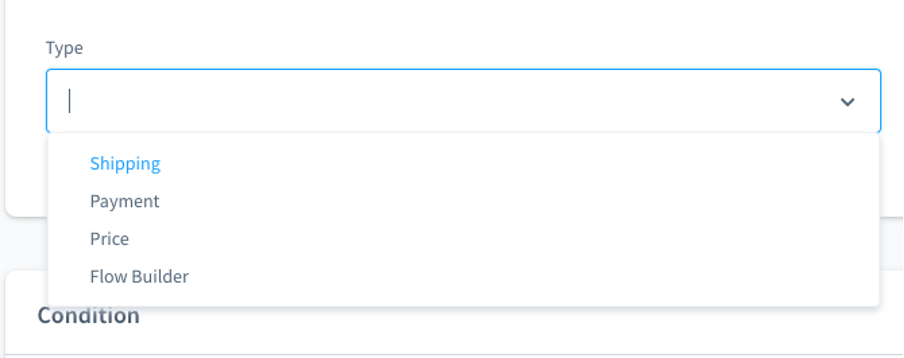
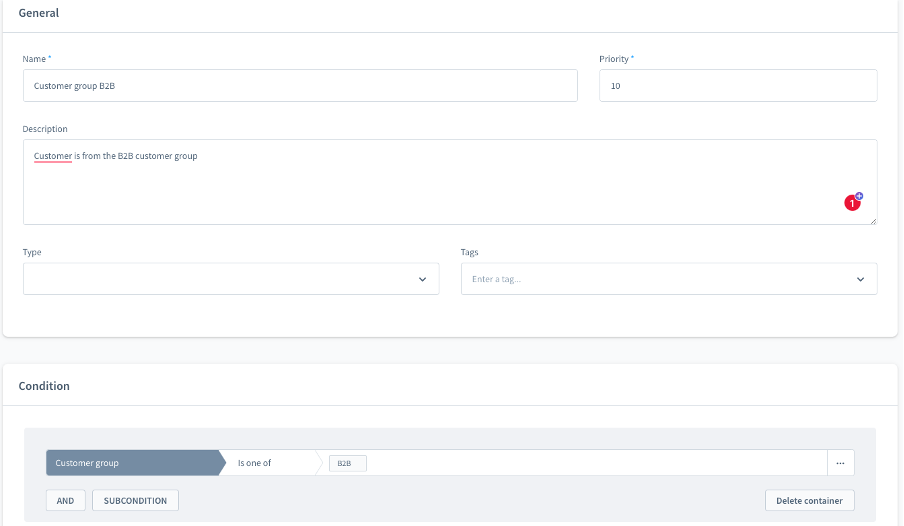
The first three fields are described above (Name, Priority and Description). At this stage, you can define the type of the rule (Type field), so that it will be available only for the functionalities selected from the list.
The next step is to configure the conditions under which the rule will operate.
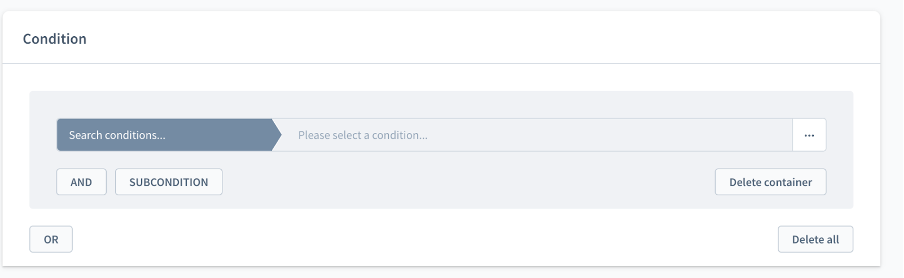
After clicking on “Search conditions…” a list will appear from which you can select to whom, to what action or to what the rule should apply. A description of each option can be found in the Shopware documentation.

Then go to the “Select operator…” field and select from the available options those that best suit your needs. The options vary depending on what you had specified in the prior field. Try it out and see what options you have.
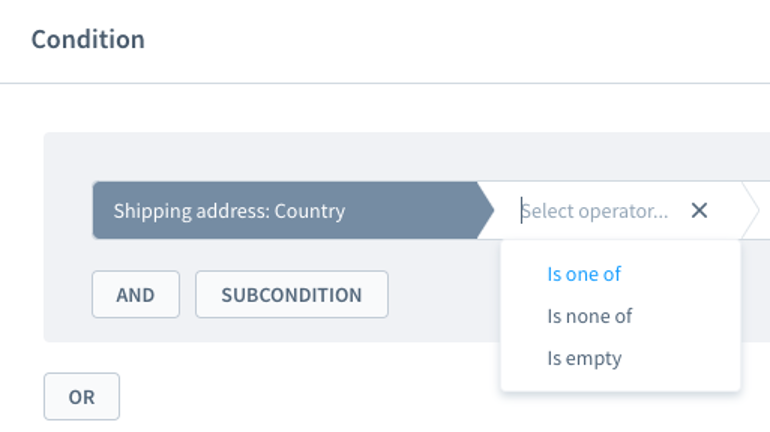
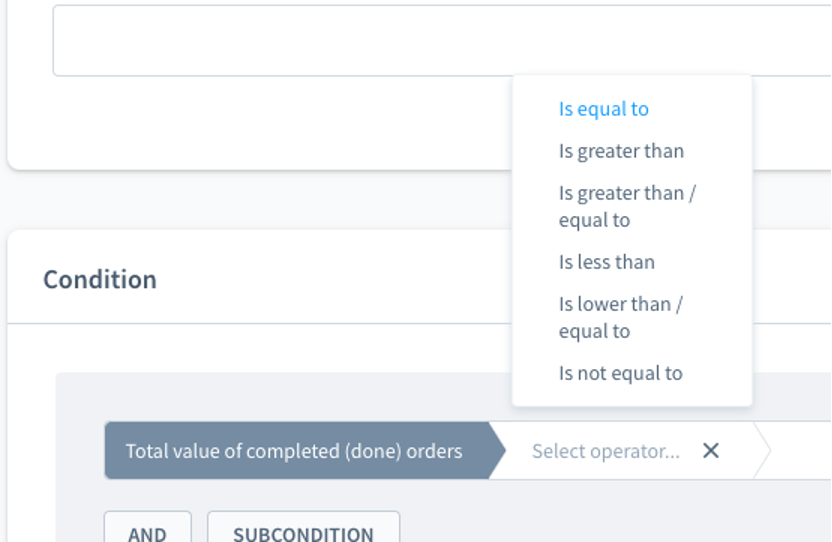
The most common options are:
- Is not Equal to,
- Is one of,
- Is none of,
- At last one,
- Is greater that.
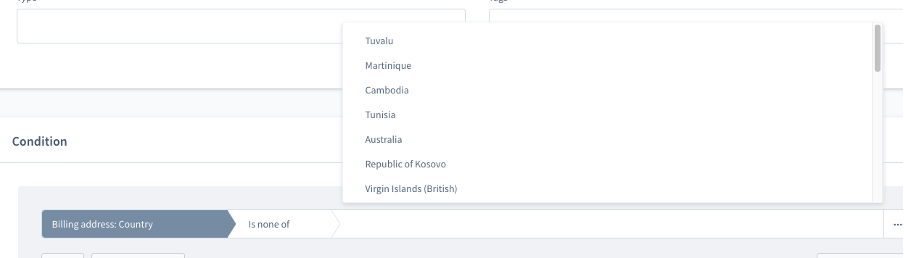
Shopware allows you to apply multiple conditions at the same time in a single rule, which gives you the possibility to create custom rules, dedicated to a specific group of customers.
In the last field of the rule, depending on what you had selected in the earlier steps, you can manually enter your own values or select them from a list.

Delete rule
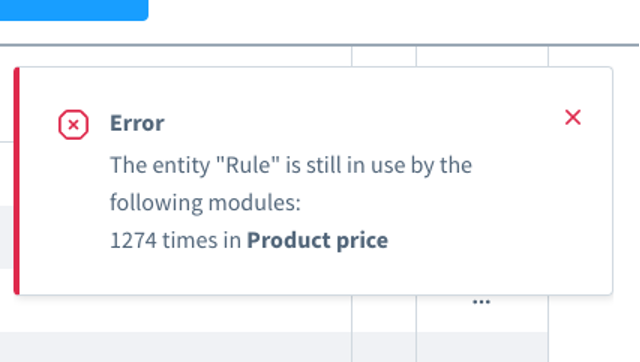
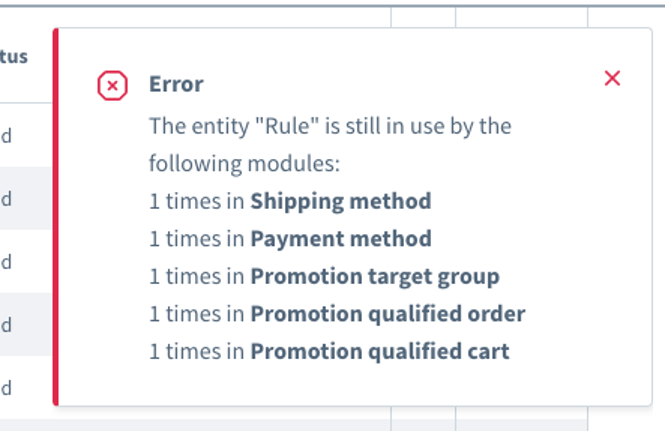
When you no longer need a rule, you can safely delete it. To do so, click on the drop-down menu located to the right of the rule’s row, and then select “Delete”.

If the rule is no longer used anywhere then it will be deleted. However, if it is still in use, Shopware will display a message to alert you about it.
Rule examples
B2B client group – simple rule
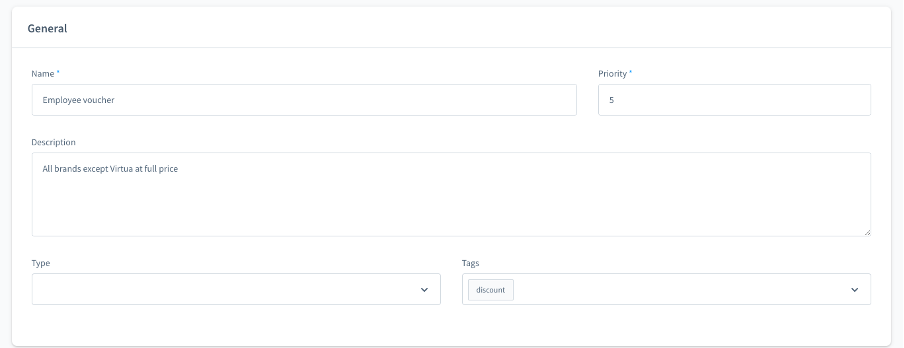
Voucher for employees – rule with multiple conditions
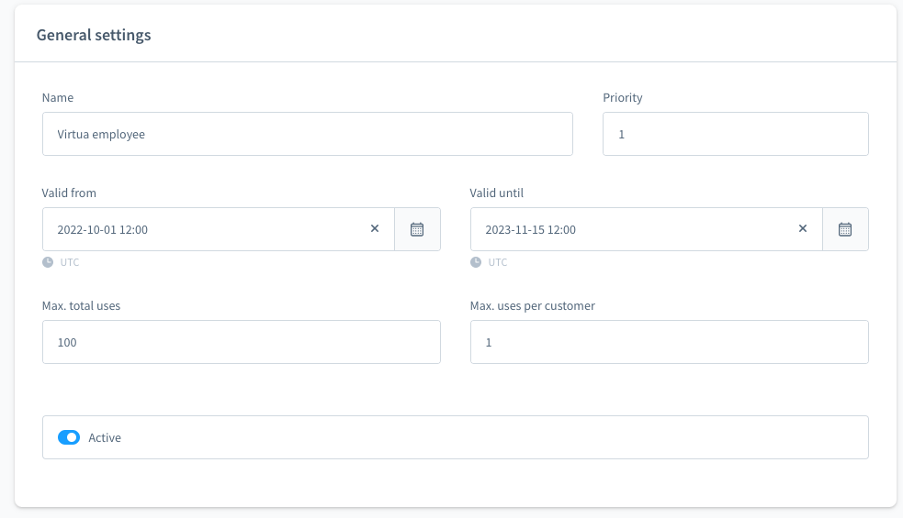
Let’s create a rule to generate a random code to be used by up to 100 users, with a specific user being allowed to use it only once.
In the General field, we have added the tag “discount” so that it will be easier for us to find this rule later (we are assuming that we have plans for more vouchers for customers and employees).
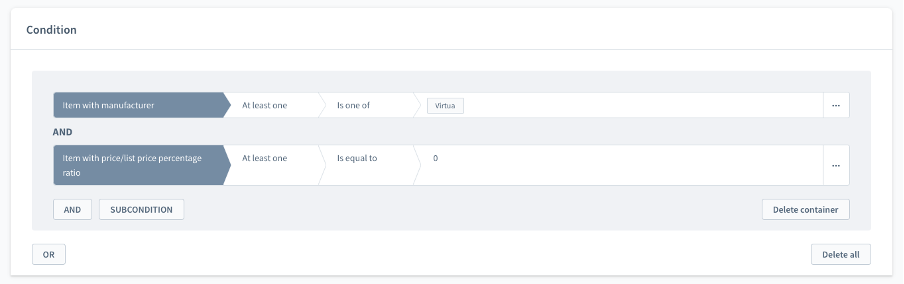
Next, in Condition, we created two conditions that must be met for the rule to work.
After clicking on the “Save” button, we proceeded to the Marketing -> Promotions tab.

We have created a new promotion based on the following criteria:
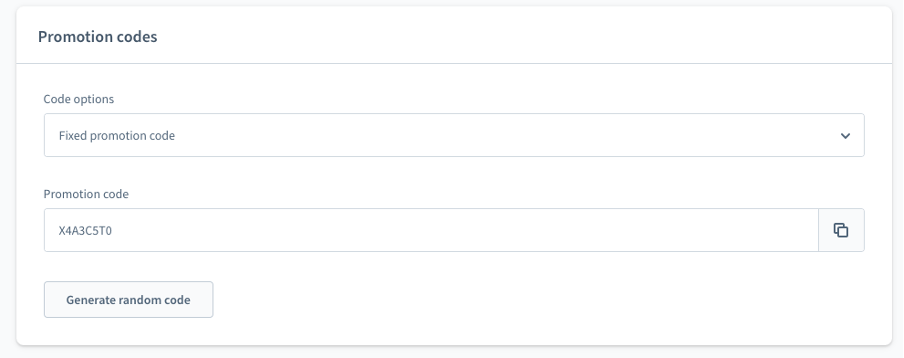
In the “Promotion codes” field, we used the option to generate a random code.
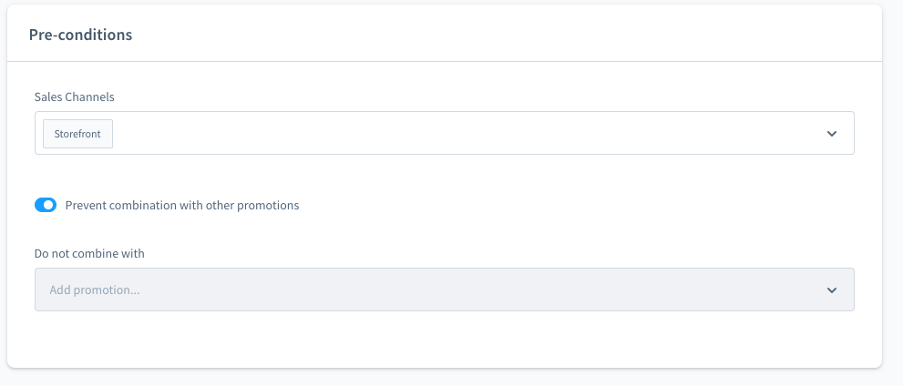
Then, in the “Conditions” tab, we applied the following settings:
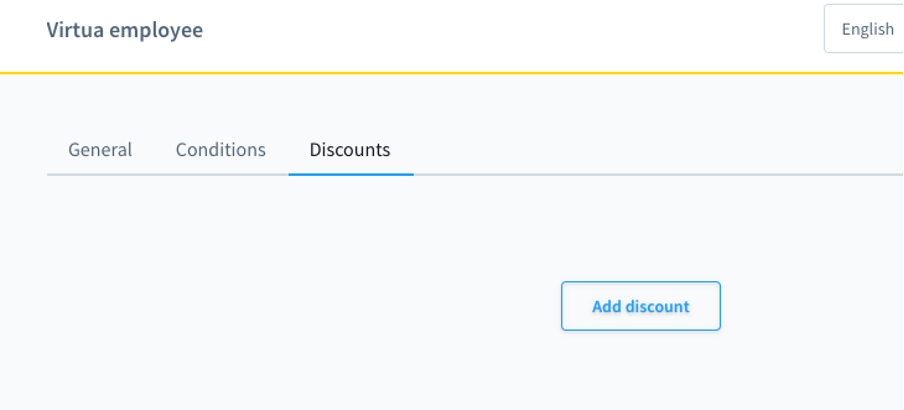
Another step was to add a discount in the “Discounts” tab.
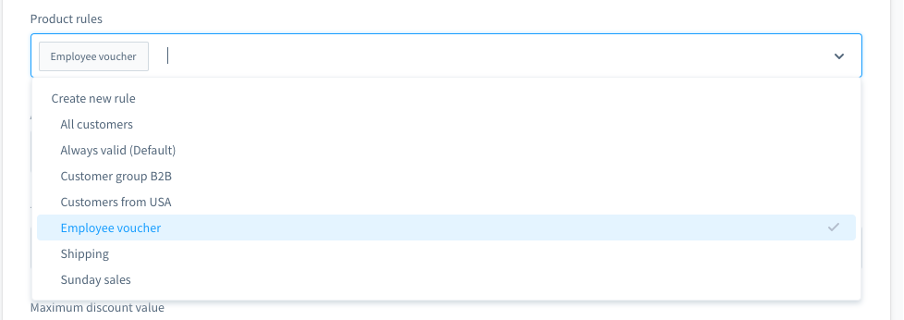
In the “Product rule” field we selected the previously created “Employee voucher” rule.
The next step was to define the level of discount.
When ready, the setting looked the following:
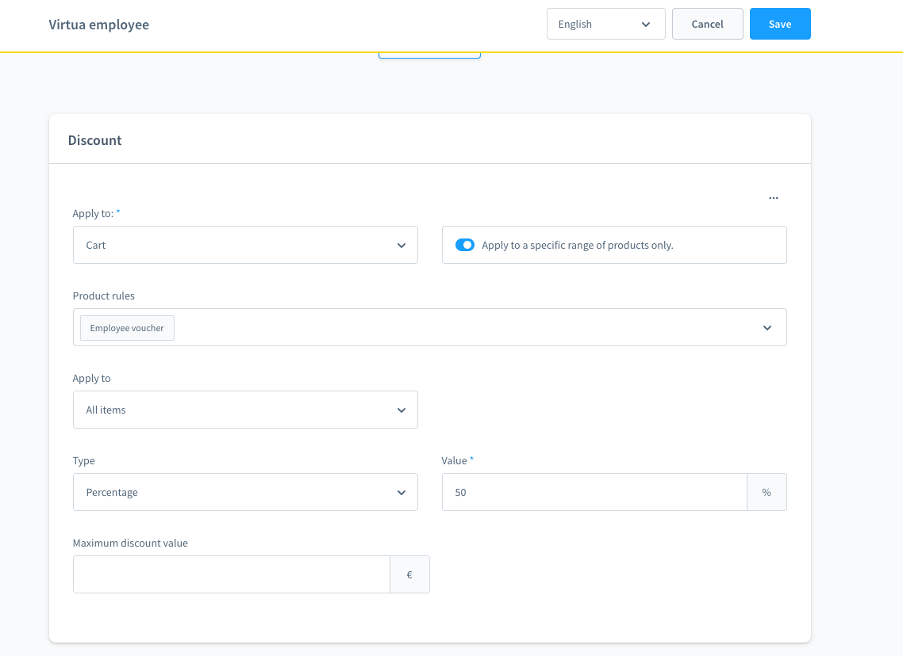
At the end click “Save”.
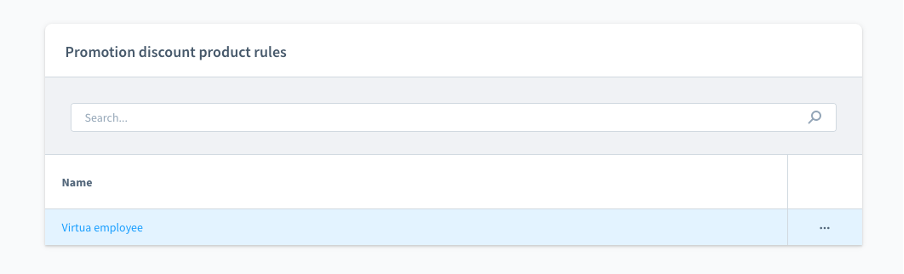
To make sure that the promotion is properly attached to the created rule, go back to the Rule Builder again, select Edit in the drop-down menu for the rule you are interested in.

Then, go to “Assignments” tab.
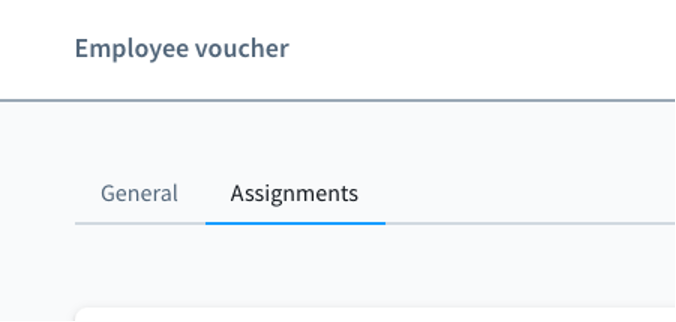
In this case, the created promotion should appear in the “Promotion discount product rules” field.
Clever and well-functioning automation of business, marketing and customer service processes is becoming an essential part of scaling a business in such a competitive market as e-commerce.
Rule Builder stands out not only because it combines the automation of many different e-commerce processes in one place, but additionally it does not require integration with external tools. You can set everything up in the Shopware administration panel, i.e. in your online sales system.
Instead of switching between different platforms, your team can focus on strategic business development issues. At the same time, you feel that your work matters and does not rely on performing mundane and repetitive tasks.
If you would like to talk about implementing Rule Builder in your store, feel free to contact us. We will tell you where to start and what processes are worth automating in your case.


